Zoom OAuth with NEXT.js App

L
I am a full-stack web developer that enjoys coding in Laravel and React.
To make apps using Zoom's API, authentication is a must. You can either do this with JWT or OAuth. If you're building a third-party service or application, OAuth is the way to go. We'll not be using an SDK for this tutorial; everything will be done from scratch.
Preliminaries:
- Register your app in Zoom's Marketplace. More details on how to do so can be found here.
- Open your terminal, go to the folder where your code is stored, and install your Next.js app by running:
npm init next-app my-next-app && cd my-next-app. Of course, you can rename 'my-next-app' into anything you choose. - Download and install Ngrok. We'll need it because Zoom doesn't allow redirects to localhost. You can choose to edit your Host file instead, but this is much easier.
Further setup:
- Create a .env.development or .env.local file in your project's root.
- Using your terminal, go to the folder where you installed Ngrok, and run
ngrok http 3000. Change '3000' to whatever port your Next app will be listening on. - Copy the secure Forwarding address to your project's .env file.
- NB: If you're using a .env.local file, ensure that you have 'NEXT_PUBLIC' appended to every variable for this guide.
Finally, insert the Forwarding address into 'Redirect URL for OAuth' and 'Whitelist URL' fields on the App Credentials page of your Zoom app.
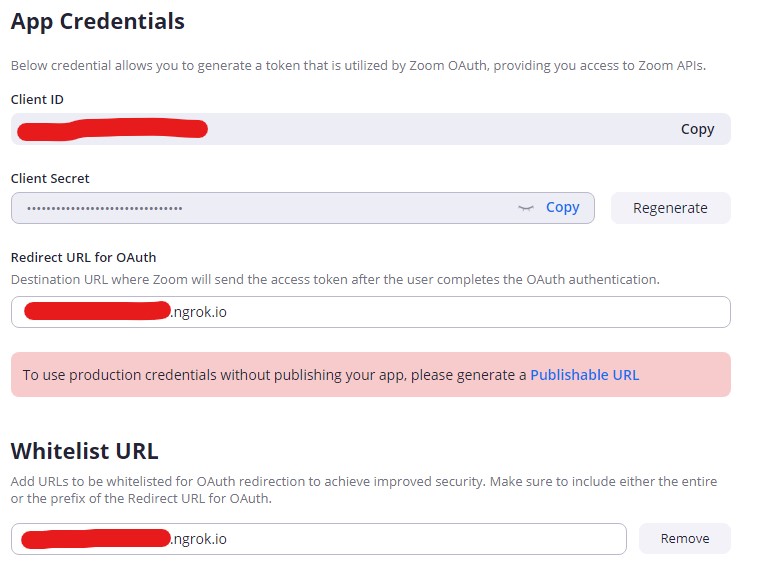
- Scopes are just as important as the 'Redirect URL for OAuth' and 'Whitelist URL' fields so don't forget to add them to your app dashboard.
- You may also want to place your Client ID and Client Secret in your .env file as a more secure way of using them in your app.
The Job Begins:
- We need to direct the user to the address
https://zoom.us/oauth/authorizewith a few params. - On your index.js page (or the page you plan to start the Zoom auth process from), we'll use the React Hook
useEffectto mount this address when the page loads. We'll also be using the hookuseState.
import React, {useEffect, useState} from 'react'

const IndexPage = () => {
    const [url, setUrl] = useState(null)

    const makeLink = () => {
        const thisUrl = new URL('https://zoom.us/oauth/authorize')
        thisUrl.searchParams.set('response_type', 'code')
        thisUrl.searchParams.set('redirect_uri', process.env.NEXT_PUBLIC_NGROK_URL)
        thisUrl.searchParams.set('client_id', process.env.NEXT_PUBLIC_ZOOM_CLIENT)
        setUrl(thisUrl.href)
    }

    useEffect(() => {
        makeLink()
    }, [])

    return (
        <a href={url}>Start Zoom OAuth Process</a>
    )
}

export default IndexPage
- If you look at the code snippet you'll see we've used JavaScript's powerful URL Browser API. We'll be using it throughout this guide to help us manipulate URLs.
- Now when we click the link, we should see something like this:
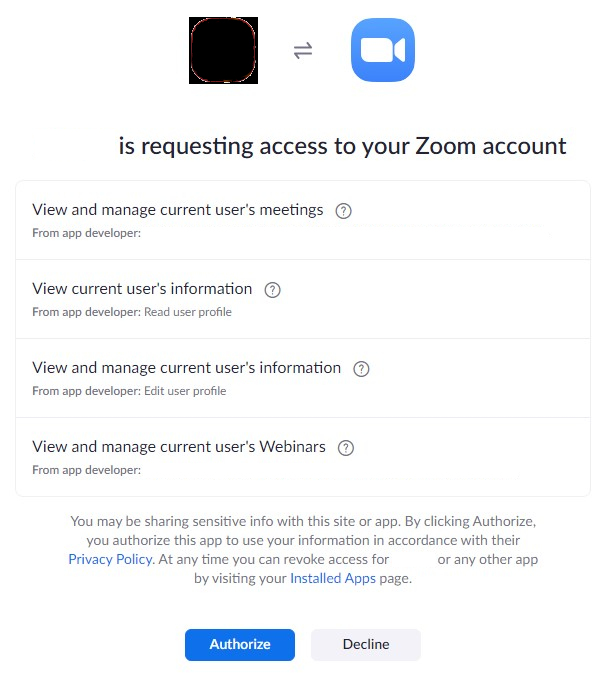
- NB: Please remember to put the same redirect URL into both 'Redirect URL for OAuth' and 'Whitelist URL' fields. And don't forget your Scopes! That's how the customer will know what your app will do with their permission.
The Job Continues:
- When it's redirected back to your site, you will see a
codeparam followed by a random string in the URL. We'll capture that using a data fetching feature called 'getServerSideProps'. This feature is used for pre-rendering with Next SSR. If you're familiar with writing Node, you won't have much of an issue here. - First, we will generate a full URL from our request:
...
export const getServerSideProps = async ({req, res}) => {
    const thisUrl = new URL(req.url, `http://${req.headers.host}`)
    ...
}
export default IndexPage
- Next, Zoom demands that in order for us to get the access token to the user's account, we'll be making a POST request with a special code in our header to Zoom's servers. We'll generate our code like this:
base64(CLIENT_ID:CLIENTSECRET). That's pseudocode of course, so let's turn that into real code. We'll be using Node's Buffer class, which helps in the handling of binary data.
if (thisUrl.searchParams.get('code')){
        const urlParam = thisUrl.searchParams.get('code')

        const data = process.env.NEXT_PUBLIC_ZOOM_CLIENT_ID + ':' +
            process.env.NEXT_PUBLIC_ZOOM_CLIENT_SECRET
        const newData = Buffer.from(data, 'utf8')
        const b64string = newData.toString('base64')
...
- We're almost there. In order to get our access token, we should generate the URL for our POST request using the same URL API that is also a part of Node.
const zoomUrl = new URL('https://zoom.us/oauth/token')
zoomUrl.searchParams.set('grant_type', 'authorization_code')
zoomUrl.searchParams.set('code', urlParam)
zoomUrl.searchParams.set('redirect_uri', process.env.NEXT_PUBLIC_NGROK_URL)
- Above you can see that the string we captured from the
codeparam is passed into the new URL in itscodeparam. - Now, let's make the POST request to the URL we've made above. I like using try-catch blocks, as I can handle errors a lot better and the code is more organized using async-await.
try {
    const options = {
        method: 'POST',
        headers: {
            'Content-Type': 'application/json',
            'Authorization': 'Basic ' + b64string
        }
    }
    const response = await fetch(zoomUrl.href, options)
    const json = await response.json()
    ...
}
catch(e){
    console.log(e)
}
- If we click our link again (which by the way is totally fine), it will skip the permission page and you will see a new
codegenerated. We'll pass that code into the 'code' param in our new URL, and use the base-64 string we generated in our header. We wait for a response using the Fetch API (not naturally a part of Node but included with Next) and convert the response to JSON. - If all goes well, we can then retrieve the user using the access token retrieved from the JSON object that we received from the last request. So the complete try-catch block should look like this:
try {
    const options = {
        method: 'POST',
        headers: {
            'Content-Type': 'application/json',
            'Authorization': 'Basic ' + b64string
        }
    }
    const response = await fetch(zoomUrl.href, options)
    const json = await response.json()

    if (json.access_token){
        const newOptions = {
            method: 'GET,
            headers: {
                'Authorization': 'Bearer ' + json.access_token
            }
        }
        const preUser = await fetch('https://api.zoom.us/v2/users', newOptions)
        const zoomUser = await preUser.json()

        return {
            props: {zoomUser}
        }
    }
}
catch(e){
    console.log(e)
}
- Since this is basically Node, you should look for errors in your console and not in the browser. However, if you've been following along perfectly, you shouldn't have any issues. Now we need to get this data to the client-side.
The Job Ends:
- If you look at the snippet above, you'll realize that we're returning our Zoom user object in props. So just like with any React app, we can pass our data into the client like so:
const IndexPage = ({zoomUser}) => {
    console.log(zoomUser)
    ...
}
- Now what happens next is all up to you. It is advised that you try to persist your data so that it doesn't disappear if the user refreshes the page or navigates to another page. Access tokens last for an hour, so keep that in mind.
Conclusion:
- If you want to do more with Zoom OAuth, such as refreshing the token, you can learn more in the Zoom docs.
- If you're wondering how you can persist your data, one good and secure way to do so is through the use of cookies. In another blog post I will discuss how I persist Zoom user data. Ciao for now.